Cheat Day [cheet dey] – noun: The one day of the week where diet minded fitness freaks throw caution to the wind and indulge only on the most tantalizing, ridiculously calorie dense foods known to man. Often associated with the term, “carb hangover,” which occurs the morning after a particularly fruitful cheat day. Synonyms: Free Day, Fun Day, Fat Day

Thursday, April 28, 2011

The Carmelita

So somewhere between freshman year and senior year of college, I mysteriously put on a couple of pounds.   Really- I have no idea what happened.  It certainly couldn't have been my almost completely sedentary lifestyle (walking from the car to the bus stop wearing a heavy backpack counts as my daily cardio, right?)

And it was definitely not due to my diet.  I mean, it's completely healthy to sustain life off of dorm food (hot beef sandwich, anyone?) convenience food (mmmm microwave burrito) and comfort food (oh my god I have a test and it's really hard and I'm going to fail out of college and the real world is going to chew me up and spit me back out I NEED A BROWNIE!)

Ok, so maybe my diet needed a little work, eh.  Perhaps that's why I'm about 60 pounds lighter today than I was my junior year (that's like taking me and strapping a nine year old child around my waist and telling him to hold on for dear life.)

Except that nine year old is made out of pastries and grease and sadness.

Well, on that happy note- this entry is an ode to the deliciousness that got me into that situation in the first place.  I had my certain foods that did their fair share of damage, and the first few that come to mind are:
1.  Cinnamon Rolls (I'll get to you, my pretties, just you wait)
2.  McDonald's Double Cheeseburgers 
3.  Carmelita's

Carmelita's were served at pretty much every cafe and coffee shop on my campus.  These gooey, chocolatey, crumbly, delicious little guys were the perfect accompaniment to my mid morning coffee and scholastic freak out.  Or my mid afternoon coffee.  Or my latish afternoon coffee.  Or my evening coffee.  Or my late night coffee.  Or all of the above.

I completely forgot about them until a few days ago- so I decided to find a recipe and whip a batch up.  They are quick, easy, delicious and addictive.  Ready?  Set.  Carmelita time!

The Carmelita
I didn't find a lot of options when researching this recipe- so pretty much I narrowed it down using my number one recipe criteria: how much butter does it call for?  The recipe I found called for 1 1/4 cups of butter.  The others called for shortening.  Blech.

First I like to prep my ingredients, which in this case includes chopping up a half a cup of nuts, and weighing out my chocolate. 


The original recipe only calls for 6 ounces of chocolate chips.  I prefer to about double this.  The husband agrees.  I think I ended up using about 10 ounces total, but 12 would be just fine! 


I creamed my butter and sugar together.  The recipe doesn't say you have to do this. But it engrained into who I am so I did it anyway.

 I combined by dry ingredients together and incorporated this mix into my sugar and butter on low.  This is where it gets all crumbly.  I'm a sucker for all things crumbly.  Oh!  I totally need to make my crumb cake again.  Sorry- random tangent- but it's the freaking tops.

Anyway, press half this mixture (leaving about 3 cups) into a greased 9x13 pan.   Bake this for 10 min at 350.


While it's baking, mix up your caramel and 3 tablespoons of flour.


Take out the crust, and sprinkle your chocolates and nuts over it.  Then drizzle the caramel over this.  Oh dear- here's where I'm getting all excited.


Sprinkle the rest of the crumb mixture over top of it, and bake for another 18 min or so until it's golden brown.  Let it set up before you cut into it.  If you can.  If you can't- I don't blame you- but prepare for messiness to ensure.

Verdict: totally brings back some mega delicious memories.  Maybe next time I'll mix in some butterscotch chips too!  That would freaking rock.

Alright, and here is my recipe:

Carmelitas
Recipe Adapted from: http://www.grouprecipes.com/51568/oatmeal-carmelitas.html

Ingredients
2 cups all purpose flour
2 cups quick cooking oats
1 1/2 cups firmly packed brown sugar
1 tsp baking soda
1/2 tsp salt
1 1/4 cup butter

1 (12.5 oz) jar caramel ice cream topping
3 tbsp flour
10 - 12 oz chocolate chips (or about 2 cups)
1/2 cup chopped nuts (walnuts are my favorite!)

Set oven to 350 degrees F. grease a 13 x 9 inch pan. in a large bowl, combine all base ingredients, first creaming the sugar and butter together, then adding the dry ingredients.  Mix at low speed until crumbly., reserve half of crumb mixture ( about 3 cups) for topping.

Press remaining crumb mixture in bottom of greased pan and bake for 10 minutes at 350 degrees f.

While this is in the oven, in a small bowl, combine caramel topping and 3 tablespoons flour.

Remove partially baked base from oven; sprinkle with chocolate and nuts.  Next, drizzle caramel topping evenly over nuts.  Finally, sprinkle reserved crumb mixture over caramel

Bake at 350 degrees f. for additional 18 to 20 minutes or until golden brown....

Cool 1 hour......then refrigerate 1 to 2 hours or until filling is set cut into bars

Sunday, April 24, 2011

Strawberry Birthday Cake

Easter: A pretty major holiday for those obsessed with baking cutesy concoctions.  I mean- what do you think of when you think of the word "cute?"  Pastels and cotton tailed bunnies and fluffy duckies come to mind?  No?  Well, that's just plain wrong!

Oh!  And babies, and anything made mini, and when puppies are dressed up like "people."

None of those have anything to do with Easter.  At least not how I celebrate Easter.  But heck, to each his own.

So anyway, I was completely pumped to bake something amazingly adorable, yet strangely, I was lacking inspiration.  From Easter bunny cake pops to cupcakes baked in egg shells to pretzel bird nests with candy eggs to adorable Easter cookies, I felt like everything worth doing had been done.  And done probably better than I could accomplish.  Drat.

So then my in-laws called and told me they needed not one, but two birthday cakes for the weekend and I decided to do that instead.  Pressure's off!

Until next year, deceptively intimating Easter treats!

Strawberry Birthday Cake
So why a strawberry cake, you ask?  Was it because I saw some delicious strawberry treat in a bakery that I just had to re-create?  Was it because incorporating fruit into desserts gives you a false sense that it's "healthier?"  Was it because the most delicious strawberry cake ever appeared to me in a dream? 

Answer: Nope!  Last night I actually dreamed that my husband got eaten by a giant hippo that was chasing us through the rainforest cafe.  Hilarious, yet surprisingly unsettling.

So the reasons I made a strawberry cake are as follows:
1. It's pink
2. We are celebrating husband's Grandmas birthday over Easter- and Easter is a very "pink" holiday.
3. It's for husband's Grandma.  Grandmas are girls!  Girls like pink!  I'm a girl- I like pink!!  Yay, pink!
4. I originally wanted coconut to use up the coconut I bought to fix a certain cake-tastrophe, but husband claimed that he "didn't know if his family liked coconut."  He later suggested German Chocolate... which, you know, doesn't have coconut in it or anything.  Read: Husband didn't want a plain coconut cake.  So strawberry it was!  (I also made an Oreo cake, described here.)

So here we go!

First, I made the cake using my favorite white cake recipe, which I adapted to be strawberry instead.  I use this recipe all the time.  If it ain't broke, don't fix it!

First, mix together your dry ingredients (strawberry cake mix, flour, sugar, salt) and then add in your wet ingredients (water, vanilla, eggs, oil, sour cream that you have placed into a cute polka dotted glass like I did.)

Polka dotted glass optional.
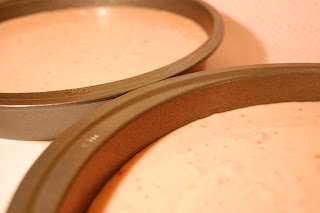
Mix it all up and pour equal amounts into two greased and floured 9 inch pans.


And they are ready to go into the oven!  Like I've said so many times before, you can freeze these guys until you are ready to use them.

The Filling
This filling was most definitely improvised.  I was making this along side of the Oreo Fluff Cake, and I wanted to adapt the Oreo fluff filling into a strawberry filling.  Mainly this was due to being lazy.  Also, I had a wicked craving for some "fluff" type concoctions, and I figured adding strawberries to the Oreo fluff recipe, instead of the Oreo's, was kind of fool proof. I was almost right.  Almost...


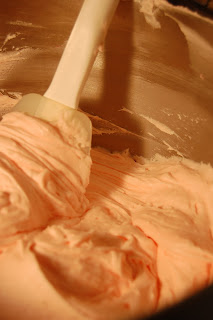
So blend together your cream cheese and strawberry preservers.  Here is where I was envisioning this super adorable pink fluff starting to form.  In all actually, it turned kind of gray and ended up looking fairly white in the end.  In the cake, it looked crisp white.  Oh well!


Next, add in your can of sweetened condensed milk and blend.  Finally, fold in the cool whip and your strawberry fluff filling is complete!
The filling


The Assembly
Alright!  Here we go!  The fun part.  For me, this was Saturday morning of cheat day and I could sample to my little hearts content.  This is the way to bake.  I feel like baking is the most successful when you finish, and you are too full to try what you created.  I mean, you power through like a champ of course.

First, make a double batch of My Favorite Butter Cream Frosting, and dye it pink.   Let the adorableness commence. 


So I think this is the first time I've improvised something here and it didn't go terribly, terribly wrong.  Oddly enough, I've never cut my cake tiers to add extra layers of filling.  But it wasn't too bad- I just used a large, sharp serrated knife and sliced it very careful.  I kept the parchment on top so I could steady the cake with my hand and not get all messy. 
So why did I choose now to try this?  Well, the very non-pink strawberry fluff filling was not only the wrong color, it was also the wrong consistency.  It was kind of "loose," you know?  Just a little soupy.  Luckily, it set up in the fridge pretty well, so I felt like I could solider on with the recipe.  But I most definitely didn't want to glob the stuff in one single layer, so by slicing the two cakes, I could do three thin filling layers instead.  And it worked!  No cake-tastophe here! 

Time to get this cake together!  Pipe a circle of butter cream around the bottom layer, and fill with fluff, and place the next cake on top.  Repeat.  Repeat.  You get the drift.


You'll end up with something like this!   Place your prettiest cake layer on top, and get ready to frost.  Since your frosting is already in a bag, just go ahead and pipe it onto the cake. 

I love doing it this way- you don't have to worry about the scraping motion picking up little bitty crumbs that make the cake look lame.  

The cake still ended up looking a little lame when I smoothed it out, but I was getting tired, and this honestly was the best that was going to happen at this point. 
Ugly cake!

Ugly cake gets slightly smoothed out.  If you have more pride in your work than I do, it'll probably end up smoother than this.  Sorry!  I was running out of time.  I let this set up in the fridge before piping on the decorations. 

Since I obviously didn't get a super smooth finish on the first go around, I used a damp paper towel to smooth down the top before I piped on my decorations.  Load up your piping bag with some more butter cream, and go to town! 

And here is the final product! I got the little sugar flowers at hobby lobby.  Way easier than learning how to actually pipe them. 


 So what's the cake-verdict?  Adorable!  Super spring-tabulous.  Definitely satisfied my craving for all things "fluff."  I think at the end of the day, my favorite strawberry filling will always be jam, lemon juice and powdered sugar, but this was different and light and delicious.  And by light, I'm talking about weight- not nutrition.  Because dear lord, this recipe is anything by light.  On that note, recipes time! 


The Cake:
Adapted from http://www.food.com/recipe/white-almond-sour-cream-wedding-cake-69630


Ingredients
(18 ounce) box strawberry cake mix 
cup flour
1 cup sugar
3/4 teaspoon salt
1 1/3 cups water
1/8 cup vegetable oil
teaspoons real vanilla
1 (8 ounce) container of sour cream
large egg whites

Directions
Mix dry ingredients in mixer, and then blend in the wet ingredients.  

Pour into greased and floured 9 inch pans, tapping them to get the air bubbles out.
Bake at 325 until done (check time on boxed mix)


Once cooled, put cakes on parchment rounds, cover in saran warp, and place in gallon freezer bags and freeze until ready to use (making sure to defrost them the day before stacking the cake!) 


Strawberry Fluff Filling:
Recipe from: http://www.cooks.com/rec/view/0,1913,150160-224196,00.html

Ingredients
1 (8 oz) package of Philadelphia cream cheese (Softened)
4 oz Seedless Strawberry Preserves
14 oz. Sweetened condensed milk

16 oz. Cool whip

Directions
Mix softened cream cheese preserves.  Add the sweetened condensed milk.  Fold in cool whip and let set in the fridge for at least an hour before assembly.  


The Frosting:
Make a double batch of My Favorite Butter Cream (more for decorations, if needed.)  For this cake, I used regular old salted butter, skim milk and red food coloring.  For the yellowy accents, I used Irish Butter and heaving whipping cream instead of milk. 


Oreo Fluff Cake

Since I've already blogged about pretty much every component of this cake, I'll make this short and sweet!  As you know from my post, Strawberry Birthday Cake, I was charged with making not one, but TWO last minute birthday cakes for the weekend.

Well, since husband really super mega wanted an Oreo cake again, I thought I would just post links to the recipes I used and a few notes and pictures on assembly.   I figure, one entirely new experiment per cheat day is enough (the Strawberry Cake)- so this was my safe, easy, I-know-it's-going-to-good dessert.

Here we go!

The Cake
See Trio of Oreo Cupcakes: Make the chocolate cake recipe in two 9 inch rounds

Oreo Fluff Filling
See Trio of Oreo Cupcakes: Make a half batch of the Oreo Fluff filling.

Oreo Cream Cheese Butter Cream Frosting
See My Favorite Butter Cream Frosting: Make a full batch
See The Best Cream Cheese Frosting: Make a full batch

Combine both batches of frosting, setting aside about 1/3 of the mixture for decorating.
Crush ~10 Oreo cookies using a food processor, and fold into the frosting.

My Favorite Butter Cream Frosting

The quest for the perfect butter cream has not been easy.  Countless hours were spent in the kitchen preparing batch after batch of delicious frosting.  Do you use butter or shortening?  Vanilla, butter, or almond extract?  Should you make traditional or Swiss?  Thin it with cream or milk?  The variations are never ending.

Oh- silly me, did I lead you to believe that I actually tried all these recipes?  Oops!  That was all Michelle.  Just one of the many benefits of having a friend who tested out recipes for wedding cakes- I got to taste the fruits of Michelle's labor.  Thanks, friend!

She has so graciously shared with me her findings along the way, and while I've made my fair share of butter creams, the credit for finding the perfect one goes all to her!  Yay Michelle!

My Favorite Butter Cream Frosting
Adapted from: http://www.wilton.com/recipe/Buttercream-Icing
Note: this is for the best tasting butter cream- if you are looking for a crisp, white frosting you should probably do a little experimenting on your own.  The Wilton recipe without the modification below is pretty good- but to have a completely crisp white you may need to use all shortening.  I find that icky, because butter is heavenly, but it's pretty.

Ingredients
2 sticks of softened butter (Sometimes if I'm feeling saucy, I use half Irish Butter.  Using all Irish Butter results in a very yellow, but adorable and delicious, frosting!)
1 tsp pure vanilla extract
1 (1 lb) box of powdered sugar (Sifted, if you are feeling motivated.  Or just spooned in slowly)
2 tbsp milk (I have used skim if that's what I have on hand, but I love 2%.  Michelle is a cream girl.  I knew I liked her for a reason.)

Directions
Cream your butter and then add in your vanilla.  Gradually add in your powdered sugar, one cup at a time, making sure to scrape the sides of the bowl often.  The frosting will appear dry at this point.  Add in your milk and beat until fluffy.  You can play around with how much milk you add if you prefer a different consistency, but these proportions have always served me well!


Monday, April 18, 2011

Bacon Maple Scones

It was Saturday morning, just like any other.  I was at the gym, getting my excessive workout on in order to mentally deserve cheat day.

And that's when I saw her.  Michelle- wonderful Michelle- coming to work out with me, had stopped at a new doughnut bakery before class.  This place specializes in topped, gourmet doughnuts.  They have flavors like red velvet, peanut butter cup, smores and tirimisu.  Specifically, the maple bacon bar doughnut caught my eye.  I opened the box, inhaled, and I couldn't get the salty, sweet, fried smell out of my head all throughout class.

Finally, I finished my workout and got to try one.  I took one bite, and I was hooked!  My intention of only eating half faded instantly and I scarfed that baby down in no time.  I have never made a pastry with bacon in it before, but I knew I had to now.  And while doughnuts are not my specialty- scones most certainly are.

While throwing a tea party themed bridal shower, I perfected the art of making delicious scones.  Ok- maybe not perfected- but my family certainly raves about them.  These suckers are not dry, flaky biscuits that need to be soaked in tea in order to be appropriate for human consumption.  These are moist, sweet, dense treats that have converted many-a-scone haters into scone lovers.

So my mission was clear: combine the amazing bacon/maple flavor profile that was presented to me in doughnut form with my favorite scone recipe.  Heck- I've done maple scones a million times- how can this not be improved by the addition of bacon?

So here I go!

The Bacon
Fry up a package of bacon.   Please excuse me while I enter my happy place.
Bacon collage!

Next, chop up your bacon and store in the fridge until you are ready to make your scones.


The Scones
Now that you are done frying your bacon, grab two sticks of butter.

I think that is the worlds most perfect sentance.

Anyway, I first like to chop up my butter into pea sized chunks and stick it back in the fridge, to keep it as cold as possible.


Next, put your sour cream in a bowl and mix in the baking soda.  As you prepare the rest of the dough, it will get all light and fluffy and happy.


Ok- now it's time to mix together your dry ingredients.  I was silly and did this in a regular bowl, but I suggest you do this in your stand mixer bowl, so when you incorporate the sour cream mixture, you don't have to do it by hand.
 

Now it's time to cut in the butter.  A lot of people will tell you that you can do this in a food processor, and I'm sure they are right.

There are very few things that I'm a purest about, however, and this is one of them.  I always cut in my butter by hand.  It really only takes a few minutes, and the consistency of these scones are always spot on.  I've always been too nervous to do it in a food processor, for fear I'll end up with a batch of sub-par scones.  And when you only get one day a week to cheat, that's pretty much a travesty.  So by hand it is!


Plus it's kind of like an arm workout.  So you are burning off all those calories you're about to consume!  Yup,  rationalization helps, don't it.

Finally, mix in your egg and sour cream mixture so that your flour mixture is moistened.  It will still be crumbly and that's ok.  Mix in one cup of your bacon, and turn out your dough onto your counter top to kneed slightly.  Pat it into a circle or rectangle so you can cut your scones, like so.


Place on a slightly greased cookie sheet, and bake at 350 until edges are just turning a golden brown.  I never manage to make the same number of scones, therefore from batch to batch they are always different sizes, and therefore they always take a different amount of time to bake.  Unless I'm doing mini scones, I start at 10 min and keep checking until they are done.

Yup- baking: it's a science.  Totally.

Ok, let them cool for as long as you can stand it, and it's time to whip up your glaze!  Again, totally a science.  Take about 3 cups of powdered sugar and mix in enough pure maple syrup to moisten all the sugar.


It will be very sticky and tacky at this point- pour in a couple of tablespoons of milk until it reaches the desired consistency, like shown here.


I just cant bring myself to measure maple syrup.  It's a big ol mess and I'd rather just eyeball it.  Worst case scenario, it gets too thin and you add in some more powdered sugar.

Place all your scones on a cooling rack with tin foil below it to catch the excess glaze. 

Drool.  And you're almost there.  Liberally top with the extra bacon, place the scone on plate, and consume immediately.  Repeat.  Repeat repeat repeat.


Out of the oven, these were apparently crazy good.  I wouldn't know because it was the day before cheat day and I had to wait.  Husband had three.  But when I had mine the next day, I heated it up in the microwave and it was pretty much perfection.  But I gave some to friends who had them at room temperate, and that was also amazing.

I don't think there is something you could do to make these not good.  Besides not making them.  But you wouldn't do that, now would you?

But the for the first time incorporating bacon into a sweet treat, this was a resounding success!  Will.  Do.  Again. 

Annnnnd, it's recipe time!

Maple Bacon Scones
Adapted from: http://allrecipes.com//Recipe/grandma-johnsons-scones/Detail.aspx

Ingredients
1 package bacon
1 (8 ounce) container of sour cream (I used Daisy)
1 tsp baking soda
4 cups all purpose flour
1 cup sugar
2 tsp baking powder
1/4 tsp cream of tartar
1 tsp salt
2 sticks butter
1 egg

3 cups powdered sugar
Pure maple syrup
Skim milk

Directions 
Fry bacon and chop into small pieces.  Store in the fridge until you are ready to use it.

Preheat oven to 350.  Cut butter into pea size chunks and put it back in the fridge to keep it cool.  Mix the sour cream and baking soda together in a small bowl, set aside.

Mix the flour, sugar, baking powder, cream of tartar and salt in a large bowl (your stand mixer bowl if applicable.) Cut in the butter using a pastry knife.  Mix in sour cream mixture and your egg (using your stand mixer if applicable) and add one cup of your bacon.  Retain the rest for topping.

Put dough on floured surface (it may be crumbly!) and kneed until you can form it into a circle or rectangle for cutting.  Cut your dough into triangles and place on a lightly greased cookie sheet.  Cook until edges are turning golden brown, about 10-15 minutes depending on size of scones.   

Let scones cool.

Put 3 cups of powdered sugar into a bowl to start making your glaze.  Add in pure maple syrup until all the powdered sugar is just moistened.  Thin glaze with skim milk, maybe a few tablespoons.  Drizzle glaze over scones and top with excess bacon.

Check this recipe out on CNN.com
http://ireport.cnn.com/docs/DOC-596130

Wednesday, April 13, 2011

Lemon Cheesecake Cake with Lemon Curd

So it's official- I have a problem.  Many months ago when my friends decided they wanted to have a cheesecake filled wedding cake, I was blissfully unaware of how this idea would haunt me.  They wanted a red velvet cheesecake, which I had to try, described here:


http://cheatday.blogspot.com/2011/03/red-velvet-cheesecake.html


But I couldn't stop here.  The whole concept of putting and entire cheesecake inside of cake was way too good to be put to rest.  So I started brainstorming ideas:  Turtle, Kahlua, Strawberry, German Chocolate, Brownie- pretty much any derivation of what I'm now calling, "The Cheesecake Cake" would be amazing.


I had the perfect opportunity to try out my next cheesecake cake.  My husband's mom, dad and grandma were coming up over the weekend.  This way, when I spend way too much time on making a single cake, I just tell people that it was for guests, and somehow that makes it ok.


So what was going to be my first experiment?  Well, as this was originally conceived for a wedding, I thought back to my own.  We had a simple, delicious lemon cake as constructed by the same baker who made my moms wedding cake when she married my step dad.  Her wedding occurred a couple of months after I started dating my hubbykins, and we both aboslutley loved it, so we had to have it on our day.


I digress- so the Lemon Cheesecake Cake it is!  My whole family has an obsession with lemon cake, and we actually came up with this as we were enjoying the red velvet cheesecake cake I made!


So here I go!

The Lemon Cake
I've never actually made lemon cake before this (I know, right!) so I turned to my trusty almond cake recipe (as originally brought to me by my baking partner in crime, Michelle!)

I started by dumping in the dry ingredients into my mixer:

- a lemon cake mix
- flour
- sugar
- salt

And give em' a quick stir.
I love this recipe- so easy, and it always turns out great.  Then you mix in the egg whites and other wet ingredients (water, oil, vanilla, things of this nature.)


Shame to toss out such delicious looking yolks.  Had I been smart I would have made the lemon curd too and used some of them for that.  But I wasn't smart.  Surprise Surprise.


And that's it!  I greased and floured two nice inch pans, poured the batter in, and then baked it at 325 degrees until it was done.

It ended up being something like 35 minutes- best to read the box for the cake mix you bought.


And this is how they turned out!  Now unless you are going to make everything, cool it, and assemble in one day, it would be best to throw these in the freezer for a few days until you are ready.  This does change the texture of the cake- it's a little denser and in my opinion, more delicious, so don't worry about that!  Just line each layer with parchment paper circles, then saran wrap, and then place inside a gallon freezer bag and suck the air out.  Michelle perfected this practice... and I stole it!
Tip: Tell your husband that you are putting cakes in the freezer, or he may pile things on top of them before they are frozen, causing them to be deformed.  

Tip II: Don't forget that they are in the freezer until just before your guests arrive and you still have to assemble the cake.  Not that I did this or anything....

The Cheesecake


I've made this cheesecake before, but I've never photo-documented it, so I figured I might as well go the whole nine yards and show you the entire process.

First, line a 9 inch spring form pan with parchment paper on the bottom.  This will make assembly a million times easier.  I just cut out a circle that is slightly bigger than the bottom of the pan, and synch it in using the sides of the spring form.  Spray the sucker with pan and it's ready!  See...

With that and a preheated oven, you are ready to get going on the cheesecake filling.  Soften five containers of cream cheese, and beat in your mixer until creamy.


Next, add your flour and sugar and beat until creamy. 

Stir in your lemon zest and vanilla...


Lemon pretty!   Finally, beat in eggs and egg yolks one at at time, until just incorporated.  Add the cream and pour into your prepared pan. 

So the last time I made this I thought it got too brown, so I reduced the time in the oven at 500 from 15 min to 5.  This was clearly NOT enough, as after an hour at 200, I cracked the oven open and turned it off, wandered away and played with my friends 13 month old Kaiden who I was babysitting, came back and found cheesecake soup.  I cranked the oven to 300 and let it bake until set, and guess what, it turned out fine.  Oh well- lesson learned here: you cant really screw up the baking time on this too bad, because it was still creamy and delcious.  Next time?  10 minutes at 500 followed by an hour at 200.  Maybe this will do the trick.

I put this guy in the fridge and moved onto step three...

The Lemon Curd

This part was so definitely my favorite part.  I freaking love lemon curd more than anyone ever should.  And this was my first attempt making it, and it was SO easy!

I did a little research on how to make a lemon curd without ending up with little bits of cooked egg left in it, and this was the method I settled on.  It turned out great, so it's definitely got my seal of approval!

Start with prepping: zest a tablespoon of lemon and soften your butter.  Great bakers always think in advance and have their butter out, softened.  I however... am not a great baker.  What am I?  A big fan of using low heat on my microwave to soften butter.  Tee hee


Mmmmm... butter.   Next, cream the butter and the sugar together just like you were making a cake. Apparently this is the trick to making a non-egg-chunk-filled lemon curd without breaking out the double boiler. Why?  No clue... but it works!


Mmmmm... butter AND sugar.  Next, slowly add the eggs and egg yolks, one at a time.


Mmmm... raw eggs.  Ok maybe not.  But this is where it stops looking pretty, and you start wondering if you might have a curd-fail on your hands.  But you won't.   Promise!

So here's where you add the lemon juice and it starts looking like a curdled mess.   But pour this into a heavyish pan, get it on the stove, and soon enough the butter will melt and it will again be gorgeous and delicious!


See!  Look!  It's pretty again!  And now it's simple: cook until it thickens up- just so it coats the back of the spoon.  Mine started to boil and I wasn't sure if it was thick enough, but I pulled it off the heat anyway (as you are not supposed to boil it!) and it thickened up quite a bit in the bowl- so don't worry about that.


Add your zest and voila!  You're done!  Cover your lemon curd with saran wrap (put it directly on the curd so it doesn't develop a skin) and store in the fridge until you are ready to assemble.


The Assembly/Absolute Cake-tastrophe
Alright- it's time to assemble!  For me, this was hands down and absolute cake-tastrophe.  Here is where you learn from my mistakes!  Yay learning!  Yay Improvisation!  Yay forgiving family members who don't care if the cake they are eating is actually pretty!

Alright, whip up a double batch of cream cheese frosting:
http://cheatday.blogspot.com/2011/03/best-cream-cheese-frosting.html

I swear- I don't remember the last time I made one batch of this frosting.  If you are making cream cheese frosting, chances are you want enough of it to make it count.  I almost made a triple batch.  I had to hold myself back.

Next, level off your cheesecake so it's nice and perdy!  Don't be afraid to trim off the sides if they are a bit done.  I felt mine was ok, but when I've made this in the past I have trimmed the sides too.


You'll end up with a plate of cheesecake hunks.  Eat these. If husband is out of the room- eat them quickly so you don't have to share.  I was about half way through the plate at this point.


Alright- you've got your cheesecake leveled, cakes defrosted, frosting made and in a bag, and curd out of the fridge.  It's stacking time.  Here's what I did- but I'll make sure to note exactly what to change if you are doing this!

First, I piped a circle of frosting around the bottom cake tier to hold in the curd.


What a great idea in theory- in reality... not so much.  

When I finished stacking the cake, I found that I had put WAY too much curd in this layer, and after I frosted the whole cake, a fault line of curd started spewing out due to the weight of the cheesecake and other cake layer on top of this.  So, if I were to do this again, I would either do just a layer of frosting, or a much much much thinner layer of curd.  

This is what my layer of curd looked like:  It was maybe a centimeter thick- it should have been just a super thin layer.

Another idea would be to use a butter cream frosting that has a little more heft to it as your frosting dam around the edge.  Or even a white chocolate ganache!

Last idea would be to just do a thin frosting layer here, and save the curd for the top layer only.  Anywhoo- pick which idea you like the best, and whatever you do- do NOT just glob half the curd on this layer like I did.  Bad bad bad idea.  
Well at this point I was blissfully unaware of the inevitable lemon curd disaster that would soon be occurring in my fridge, and I carried on with my stacking.  Next, place you cheesecake on top of your bottom cake tier.  I picked the entire thing up, pealed off the parchment, and placed it gingerly on top of the bottom tier. 


Pipe another circle of frosting and fill it with your lemon curd.  Totally fine to do this now- I had no problems with curd leakage on this tier. 

Oh my, this just looked delicious.  Cover the entire thing in frosting and place it in your fridge to set up.  This is where my lemon curd fault line started to form along the bottom layer.  It was actually kind of hilarious.
So what do you do when lemon is spewing out of your cake and it looks like a giant mess that a toddler could have frosted?  Add coconut!!!

Yay coconut!  I honestly just scraped off the lemony goodness that had oozed out of the cake, ate it, and pressed handfuls of shaved coconut to the edge of the cake in order to hide the disaster.  

Then, I candied some lemon peel and artistically placed that around the edge and top of the cake to try to make it pretty.  I use the word "artistically" loosely.  It wasn't pretty.  I realize this.  But it certainly was delicious!  


Alright- it's recipe time!  Seriously- despite the "learning experience" that occurred during the stacking of this cake, it was freaking amazing.  If you are a fan of lemon and decadence and amazingness and cream cheese- you will be a fan of this cake.

The Cake:
Adapted from http://www.food.com/recipe/white-almond-sour-cream-wedding-cake-69630


Ingredients
(18 ounce) box lemon cake mixcup flour
1 cup sugar
3/4 teaspoon salt
1 1/3 cups water
1/8 cup vegetable oil
teaspoons real vanilla
1 (8 ounce) container of sour cream
large egg whites

Directions
Mix dry ingredients in mixer, and then blend in the wet ingredients.  

Pour into greased and floured 9 inch pans, tapping them to get the air bubbles out.
Bake at 325 until done (check time on boxed mix)


Once cooled, put cakes on parchment rounds, cover in saran warp, and place in gallon freezer bags and freeze until ready to use (making sure to defrost them the day before stacking the cake!) 


The Cheesecake
Recipe from:  The Joy of Cooking, page 980

Ingredients (all at room temperature)
2.5 lbs (five 8 ounce packages) Philadelphia Cream Cheese 
1 ¾ cup Sugar
3 tbsp flour
½ tsp vanilla
1 tsp fresh grated lemon zest
5 large eggs
2 large egg yolks
½ cup heavy cream

Directions
Preheat oven to 500 degrees.

Beat cream cheese until creamy, about 30 seconds, scraping the sides of the bowl as you go.
Gradually add the sugar and flour and beat until smooth and creamy (another 1-2 min.)
Beat in your vanilla and zest 
Beat in the eggs and egg yolks, one at a time, until just incorporated (making sure to scrape the sides and beaters as you go.)
Finally, on low speed beat in the cream.

Pour into a 9 inch spring form pan fitted with a parchment paper round in the bottom.

Bake at 500 for 15 min and then lower the oven temp to 200 for 1 more hour.  Turn off the oven and prop it open with a wooden spoon to ensure it doesn’t crack!

The Curd
I made absolute no changes to this recipe, so you can follow the exact recipe linked here.


The Frosting
A double batch of: http://cheatday.blogspot.com/2011/03/best-cream-cheese-frosting.html

And there you have it!  All done!